Picture this, someone has put the DVD of Frosty the Snowman in and I'm thinking about having split pea soup for dinner. Meanwhile outside, it’s 105 and the middle of July. This made me think of one of my favorite classes to teach Christmas cards in July. Why not start that family project before the rush of the holidays. So while everyone else is panicking in December, you will be ready to wow your friends!
Making your own Christmas Cards is a wonderful way to celebrate this festive season. Whether you’re a crafting pro or a beginner, fast and easy cards have the greatest chance of making it into the envelope and out to the post office.
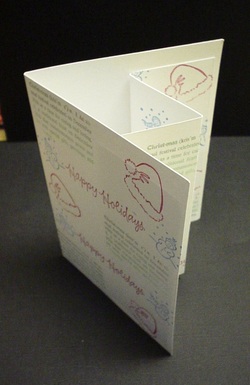
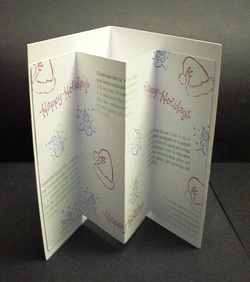
This fast and easy card pictured can be created with just a few basic supplies.

Here’s what you’ll need:
Two blank cards 1) A-2 size 4 ¼ X 5 ½ and 1) A-6 size 4 ½ X 6 ¼.
Holiday stamps
Red, Green and Yellow Dye Based Stamp Pads
Double Stick Tape
First on the front of the larger card randomly stamp holiday stamps in various sizes in dye based ink colors. On smaller card, repeat the same process on front and back of card. Fan fold smaller card. Take card, stamp side up, and fold ends into middle scored line. Use double side tape to adhere ends of smaller folded card to inside of larger card, 1” from end of larger card. For goof proof positioning. Tape down one side of smaller card into larger card. Then tape other side of smaller card, keeping it folded and just close larger card it will stick in the right position. Don’t try to assemble with both cards open. That adds a lot of unnecessary time to the card.
Your friends and family will have as much fun receiving this card as you will making it.
Just remember if the Christmas card thing doesn’t work out, add some confetti and it’s a New Year’s Card. Got heart stickers? Valentine’s. My rule of thumb though is not to let the unfinished cards go more than 2 holidays than planned. Good Luck starting early!!
 RSS Feed
